There’s a unique charm in a gift crafted by hand, a warmth that store-bought items often struggle to replicate. Among the myriad of DIY projects, making candles has emerged as a particularly satisfying and increasingly popular hobby. It’s not just about creating a flickering flame; it's about crafting an experience, a mood, and a heartfelt message. For those looking to dive into the world of creative crafting, candle making for beginners offers a rewarding entry point that combines artistry with practical benefits. Imagine filling your home with custom, delightful scents or having a stash of thoughtful, handmade presents ready for any occasion – all while saving money and embracing an eco-conscious lifestyle.
This comprehensive guide will demystify the process, transforming you from a curious novice into a confident candlemaker. We'll explore why homemade, eco-friendly candles are the perfect blend of personal touch and sustainability, delve into the essential supplies you'll need, and walk you through a simple step-by-step process. Get ready to unlock a new creative outlet that benefits your wallet, your home, and the planet.
The Allure of Homemade, Eco-Friendly Candles
What makes homemade candles so captivating? It’s a combination of factors that appeal to both our creative spirit and our desire for meaningful connections. The joy of selecting a unique fragrance, watching the wax transform, and knowing you’ve brought something beautiful into existence is immensely satisfying. This creative journey is precisely why so many people are falling in love with candle making for beginners.
One of the biggest draws is the incredible potential for personalization. Unlike mass-produced candles, yours can be tailored to any mood, season, or recipient. You can mix and match essential oils to create signature scents that evoke relaxation, energy, or festive cheer. Furthermore, making candles at home allows you to create batches of gifts effortlessly. A single afternoon can yield a dozen beautifully crafted candles, ready for birthdays, thank-you gestures, or unexpected gatherings. This eliminates the last-minute scramble for presents, replacing it with the simple elegance of a lovingly made gift.
Beyond the personal touch, there are significant financial and environmental advantages. High-quality, eco-friendly candles from boutique stores can be surprisingly expensive. However, when you craft them yourself using sustainable materials like soy wax and pure essential oils, you get superior, clean-burning candles for a mere fraction of the cost. It’s a definitive win for your budget and your home's air quality. By choosing natural ingredients, you ensure your candles burn cleaner, releasing fewer toxins and less soot into your living space, making them a healthier choice for you, your family, and your pets.
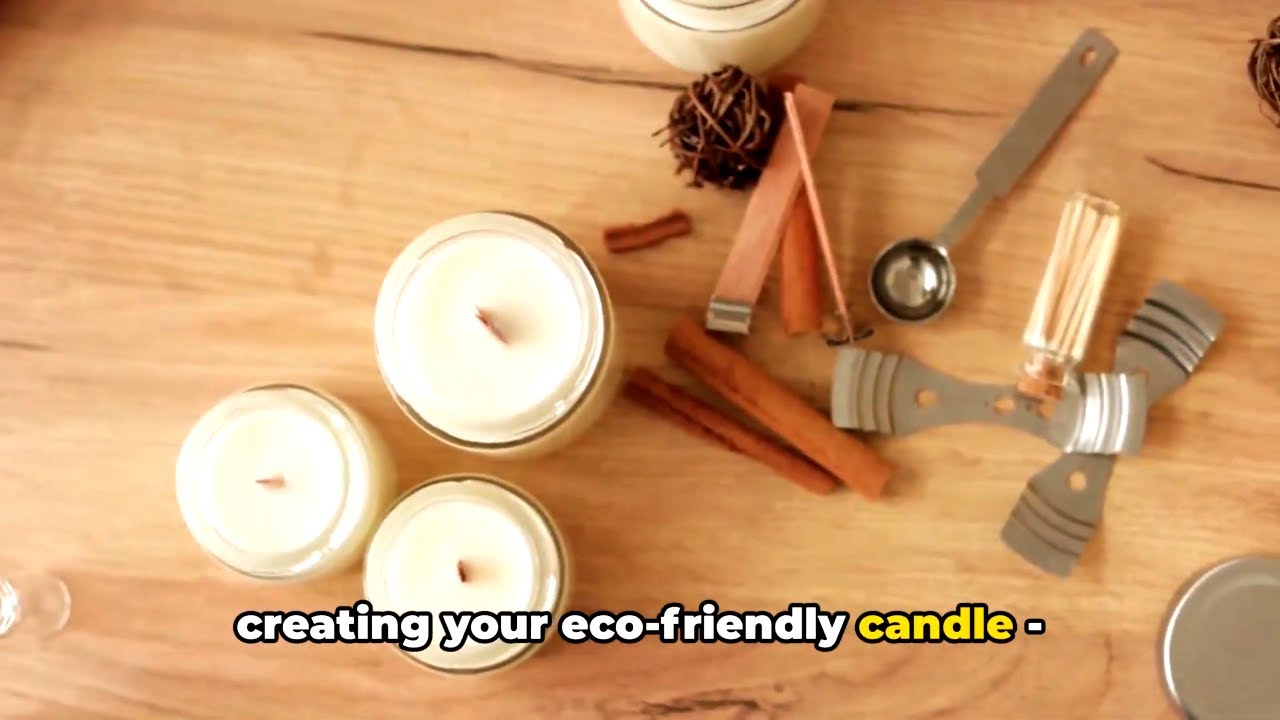
Essential Supplies for Candle Making for Beginners
One of the most appealing aspects of diving into candle making for beginners is how straightforward the material list is. You won't need an arsenal of complex tools, just a few basic ingredients and some common household items. The key is choosing the right materials to ensure your candles are not only beautiful but also eco-friendly and safe.
Soy Wax Flakes – The Eco-Conscious Choice
When it comes to the primary material, soy wax is hands-down one of the best choices, especially for beginners and eco-conscious crafters. Derived from soybeans, it’s a renewable resource, making it an environmentally friendly alternative to traditional paraffin wax. Soy wax also burns significantly cleaner, producing very little soot, which means you can enjoy your cozy candlelight without worrying about harmful particles or black marks on your walls. Moreover, soy wax is non-toxic, biodegradable, and offers a longer, more even burn, allowing your candles to last longer and diffuse scent more effectively.
Pure Essential Oils – Scenting Your Space Naturally
The magic of a candle often lies in its fragrance, and essential oils are your go-to for a natural, potent aroma. These concentrated plant extracts not only smell wonderful but can also offer therapeutic benefits, depending on the oil. When selecting essential oils, always opt for 100% pure essential oils to ensure the highest quality and avoid synthetic additives. For beginners, single notes like lavender, peppermint, or sweet orange are great starting points. As you gain confidence, you can experiment with blends like calming lavender and bergamot, or invigorating lemon and rosemary. Remember, a generous amount of pure essential oil is crucial for a strong "hot throw" (the scent released when the candle is burning). To learn more about selecting and blending natural fragrances, check out our guide: Unlock Creativity: Make Non-Toxic Candles with Soy & Essential Oils.
Natural Wicks – For a Cleaner Burn
Often overlooked, the wick plays a vital role in how your candle burns. Many traditional wicks contain metal cores or release butane gas, which can be detrimental to air quality. For eco-friendly candles, natural wicks are the superior choice. Materials like hemp, organic cotton, or wood wicks are excellent options. They produce less soot and ensure a cleaner, healthier burn. When choosing a wick, pay attention to its size; it should be appropriate for the diameter of your container to ensure an even burn pool and prevent tunneling.
Basic Tools You'll Need
Beyond the core ingredients, you'll need a few simple tools:
- Double Boiler Setup: This is essential for safely melting wax. You can use a dedicated melting pot or a heat-safe bowl placed over a saucepan of simmering water.
- Pouring Pitcher: A pitcher with a spout makes pouring melted wax into containers much easier and cleaner.
- Candle Thermometer: Crucial for monitoring wax temperature. Wax needs to be heated to a specific temperature for melting and then cooled to another specific temperature before adding essential oils and pouring for optimal results.
- Wick Clips or Holders: These help keep your wick centered and upright while the wax cools.
- Disposable Stirring Device: A wooden stick, a spoon, or a popsicle stick works perfectly for stirring wax and essential oils.
- Containers: Heat-safe jars, tins, or ceramic vessels are perfect. Repurpose old jars or buy new ones – just ensure they can withstand heat.
- Kitchen Scale: For accurately measuring wax and essential oils, especially when working with recipes.
Your Step-by-Step Guide to Candle Making for Beginners
Ready to get started? This simple guide will walk you through the process, making candle making for beginners an enjoyable and successful endeavor. For a more in-depth visual breakdown, consider our dedicated resource: Easy Homemade Candles: Your Simple Beginner's Guide.
- Prepare Your Workspace and Containers: Clear a clean, flat surface. Ensure your chosen containers are clean and dry. Securely attach the wick to the bottom center of each container using a dab of hot glue or a wick sticker. Use a wick clip or clothespin across the top of the container to keep the wick centered and taut.
- Melt the Wax: Measure out your soy wax flakes according to your container size (usually 1 lb of wax makes about 2 standard 8 oz candles). Place the wax in your double boiler setup and heat gently over medium-low heat. Stir occasionally until the wax is fully melted and reaches approximately 185°F (85°C). Use your thermometer to monitor the temperature.
- Cool and Add Essential Oils: Once the wax is fully melted, remove it from the heat. Allow the wax to cool down to around 160-180°F (71-82°C) before adding your essential oils. Adding oils at too high a temperature can cause the fragrance to evaporate. Measure your essential oils (typically 0.5 to 1 ounce per pound of wax for a strong scent) and stir them into the wax thoroughly for at least 2 minutes to ensure even distribution.
- Pour the Wax: Carefully pour the scented wax into your prepared containers, leaving about ½ to 1 inch of headspace from the rim. Pour slowly to avoid air bubbles.
- Cure Your Candles: This is a crucial step! Allow your candles to cool and cure undisturbed at room temperature for at least 24-48 hours. For an optimal scent throw and an even, long-lasting burn, a curing period of 1-2 weeks is highly recommended. During this time, the wax molecules bond with the fragrance oils, strengthening the scent.
- Trim the Wicks: Once your candles are fully cured, trim the wick to about ¼ inch (0.6 cm) before its first burn. This prevents excessive smoking and ensures a clean, even flame.
Personalization & Gifting: Beyond the Basics
The true magic of candle making for beginners lies in the endless possibilities for personalization. Your candles can be as unique as the person receiving them or the space they’ll illuminate.
- Custom Scents: Don't limit yourself to single essential oils. Experiment with blends! Combine lavender and cedarwood for a calming aroma, or grapefruit and spearmint for an uplifting one. The possibilities are truly endless.
- Unique Containers: Beyond standard jars, consider repurposing elegant teacups, vintage tins, small ceramic pots, or even interesting glass bottles. Thrift stores are treasure troves for unique, heat-safe vessels.
- Aesthetic Embellishments: Elevate your candles with simple decorations. Attach a personalized label, tie a rustic twine or elegant ribbon around the jar, or even add a sprinkle of dried botanicals (like lavender buds or rose petals) to the surface of the wax while it's cooling (ensure they are away from the wick to prevent fire hazards).
- Batch Gifting: The ability to make candles in batches makes them the ultimate go-to gift. Create a collection of themed candles for holidays, birthdays, or just as thoughtful thank-you presents. You’ll always have a meaningful gift on hand, crafted with love.
The Financial & Environmental Benefits of DIY Eco-Candles
Embracing homemade eco-friendly candle making delivers a powerful double whammy of benefits for both your wallet and the planet.
Financially, the savings are significant. A single high-end soy candle can cost upwards of $20-$40, while the raw materials to make several comparable candles at home often cost less. Over time, this hobby pays for itself, allowing you to enjoy luxury-quality candles without the premium price tag. You're investing in materials, not brand markups.
Environmentally, choosing soy wax and pure essential oils drastically reduces your carbon footprint. Soy wax is a sustainable, renewable resource, unlike petroleum-derived paraffin. Natural wicks further minimize soot and harmful emissions. By making your own, you’re also reducing packaging waste and supporting a cleaner, healthier home environment free from synthetic fragrances and toxins often found in commercial candles. It’s a mindful choice that benefits both personal well-being and planetary health.
Embarking on the journey of candle making for beginners is more than just learning a new craft; it’s an invitation to cultivate creativity, embrace sustainability, and discover the profound joy of making something truly special with your own hands. From the initial melting of the wax to the final flicker of the flame, each step offers a moment of mindful creation. You'll not only save money and enhance your home with beautiful, non-toxic scents but also gain the satisfaction of giving unique, handmade gifts imbued with personal care and affection. So, gather your supplies, follow our guide, and light up your world with the warm, eco-friendly glow of your very own homemade candles.
